

CourseStorm Registration and Account Set-Up Step-by-Step for Patrons
Step-by-step process for a customer (that needs to create an account), starting from the moment they click on a class:
Step 1: Click “Register” on the Class Page
Once you are on the class detail page, click the “Register” or “Sign Up” button.
If the class has multiple schedule options or sessions, select your preferred time before clicking the button.
Step 2: Choose Who is Taking the Class
A window will pop up asking: “Who is taking this class?”
Select your name if it is for you or select an existing family member’s name.
If the person isn’t listed yet, click “Add a new person” to type in their name and birthdate, then click “Next”.
Step 3: Enter Your Email to Create Your Account
Because you are not yet logged in, the system will ask for your Email Address. Enter it and click “Next”.
The system will recognize that you don’t yet have an account and will prompt you to enter a Password, your First Name, and your Last Name to instantly create your account profile.
Step 4: Fill Out the Registration Form
Answer any specific questions required for the class (e.g., emergency contact info, medical/allergy notes, applicable member discount, etc.).
Check the box to agree to any required waivers, liability forms, or cancellation policies.
Click “Save and Review” or “Add to Cart”.
Step 5: Review Your Cart and Check Out
You will be taken to your shopping cart showing the class and the student’s name.
Optional: If you want to add more classes, click “Keep Browsing” and repeat the steps above.
If you are ready to finish, click “Proceed to Checkout”.
Step 6: Enter Payment and Confirm
Enter your Credit/Debit Card details securely.
Review the final price summary.
Click “Pay and Register” to complete the transaction. You will instantly see a confirmation screen, and a receipt will be sent to your email.
Step-by-step process for a customer who already has a CourseStorm account, starting from clicking on a class:
Step 1: Click “Register” on the Class Page
Navigate to the class you want and click the “Register” or “Sign Up” button.
Step 2: Choose Who is Taking the Class
A window will pop up asking: “Who is taking this class?”
Select your name, or select the name of a previously saved family member or friend. Click “Next”.
Step 3: Log In to Your Account
The system will ask for an email address. Type in your registered email and click “Next”.
CourseStorm will recognize your email and change the screen to show a Password field.
Type in your password and click “Log In”.
(Note: If you forgot your password, click the “Forgot Password?” link right below the box to get a reset link emailed to you).
Step 4: Fill Out the Class Form
Any information you saved during past registrations (like your phone number or address) will automatically fill itself in.
Answer any new, class-specific questions (such as emergency contacts, waivers, member discount, etc.).
Click “Save and Review” or “Add to Cart”.
Step 5: Review the Cart and Check Out
You will be taken to your shopping cart showing the class and the student’s name.
Click “Proceed to Checkout”.
Step 6: Verify Payment and Confirm
If you chose to securely save your credit card during a past purchase, your payment method will already be selected. If not, type in your card details.
Click “Pay and Register”.
You will instantly see a success screen, and a confirmation receipt will be sent to your email inbox.
CourseStorm step by step screenshots
Once you click register
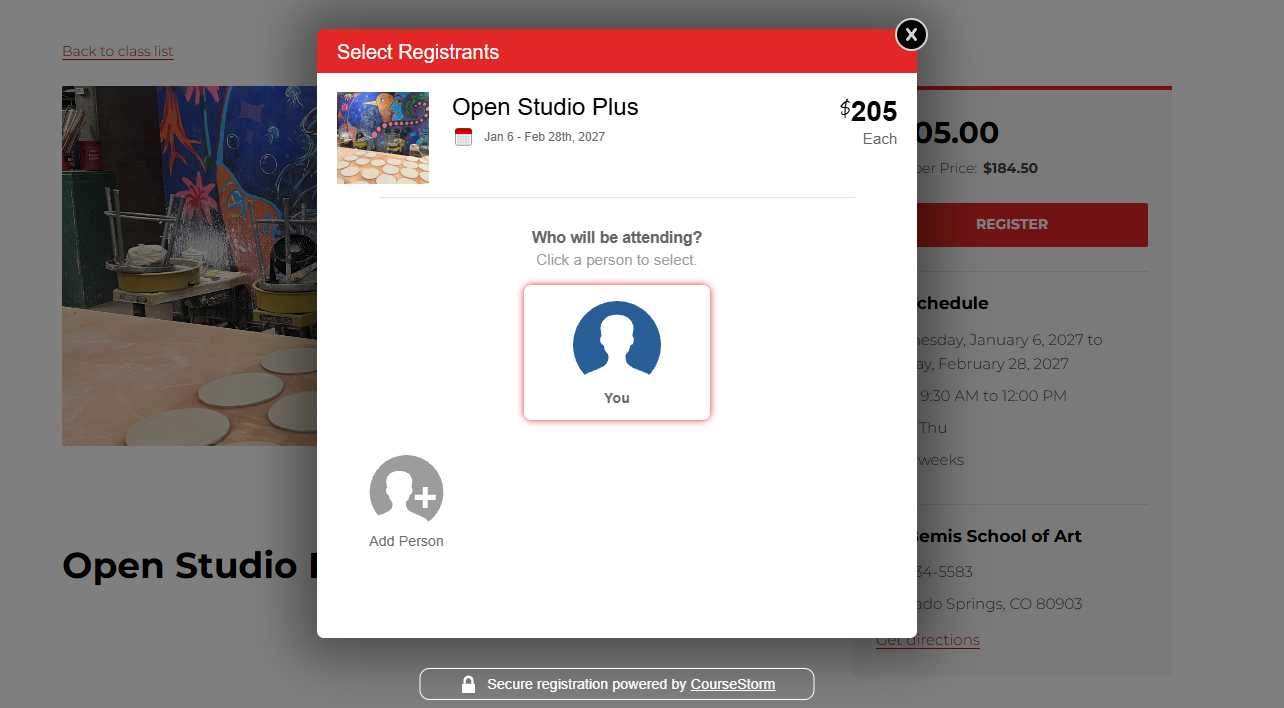
Click “you”
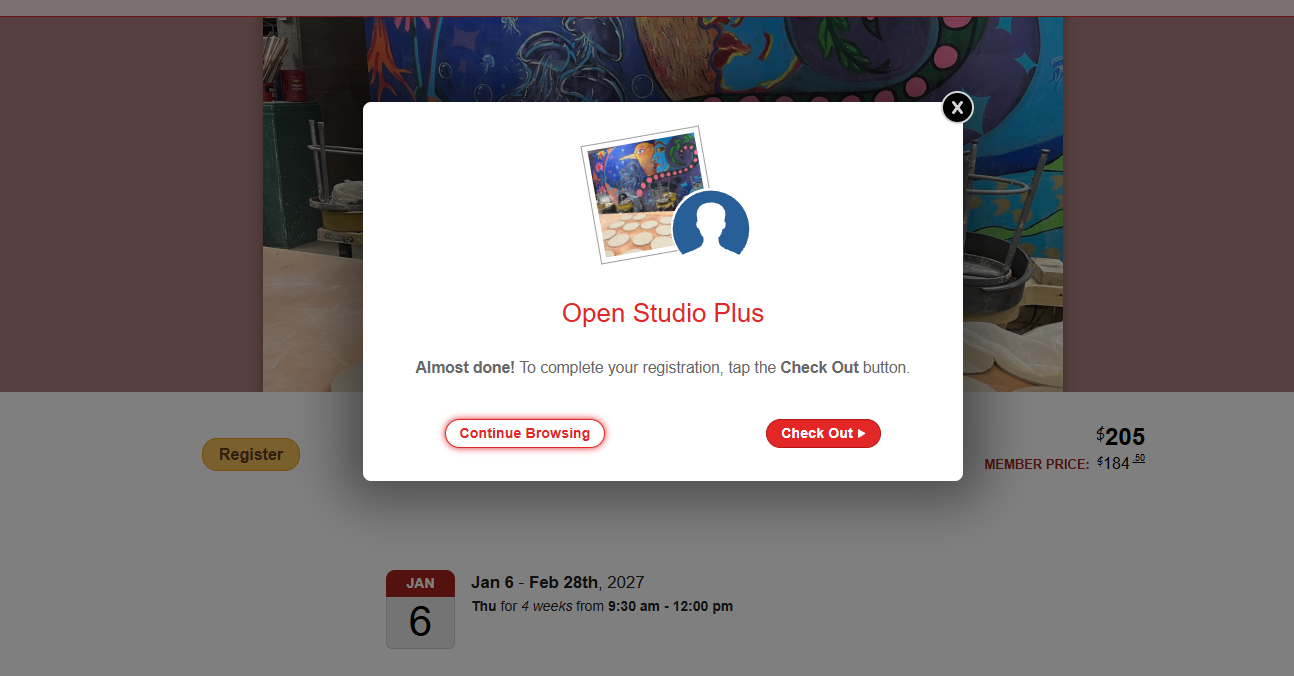
Click check out
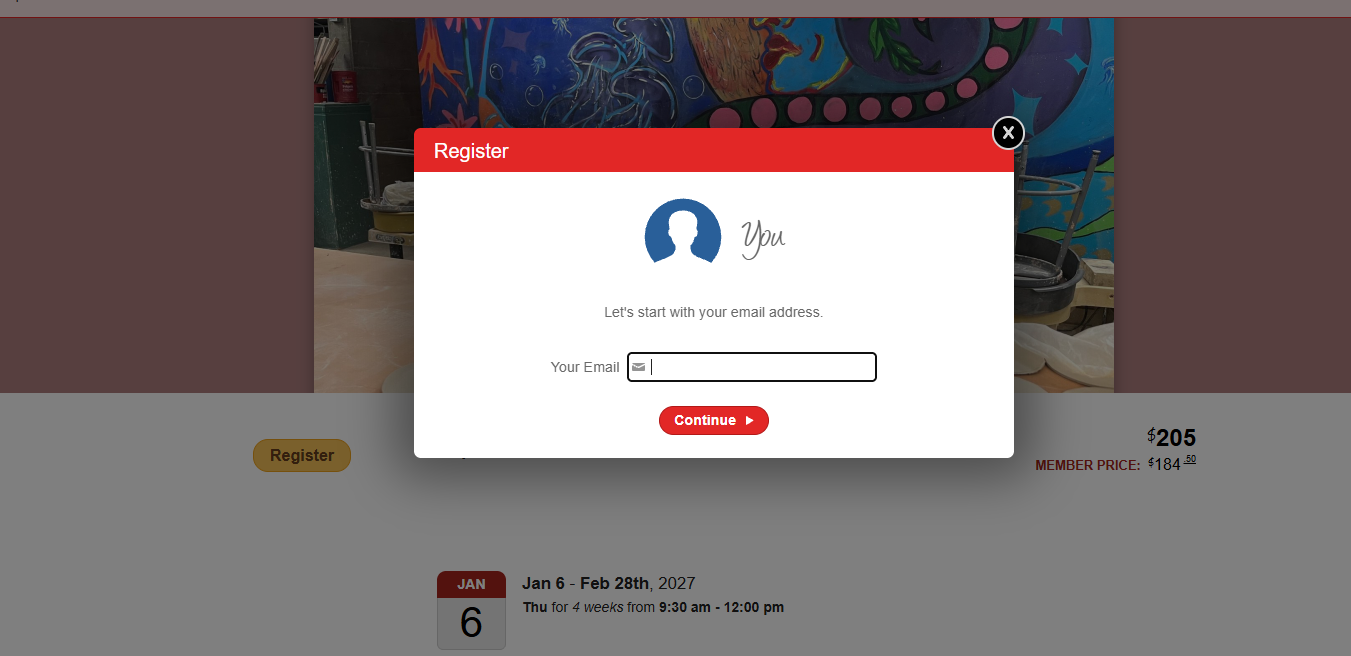
After you put in your email address, you will need to fill out your info if you do not have an account. If you already have an account you will be prompted to type in your password.
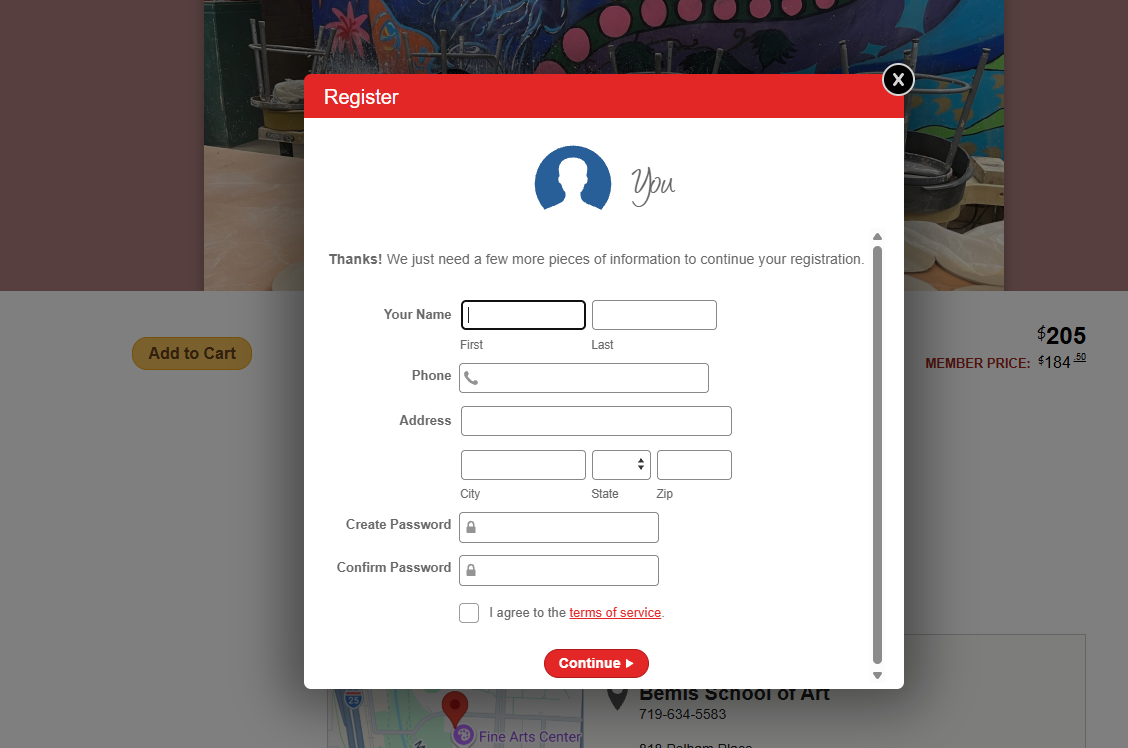
Once your account is created you will proceed to fill out any registration forms specific to the class, as well as accept any waivers. Then proceed to the payment page.